Modifications to Helen’s VFR
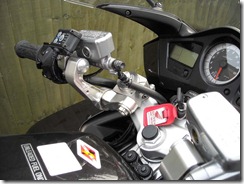
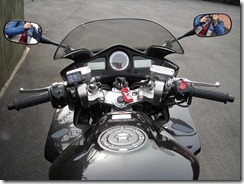
Helen decided even before she bought the VFR that she wanted a set of Variobars fitting to the VFR, so she didn’t have to lean heavily on her wrists. She bought the set of Gilles Variobars and bar riser kit in silver at the same time as she bought the bike from Hunts.
I unpacked the bars and was very impressed by the quality of the bars and components. The instructions I wasn’t so impressed with, they were in bad translated English and the extra instructions and kit of parts for a VFR were useless. The picture and instructions I believe refer to the previous VFR model as in 1 of the pictures a pipe is missing in the picture which gets in the way of their intended clutch routing path. So I completely disregarded the instructions and went about installing the bars as I thought best.
 I started with the left bar first and it became quickly evident that the clutch would need re-routing or it wouldn’t reach the fluid reservoir. So I drained and disconnected the pipe and re-routed it over the top of all of the brake pipes and cabling on the left side, then reconnected it and filled and bled it back up. I also re-routed all the cables to the left bar switches, they were originally on the inside of the fork, but had to be routed on the outside of the fork. Although the bars have many adjustment positions, due to the location of the screen pillars and tank I was limited to only a few of them. Next I started on the right hand bar, fortunately the brake pipe to the reservoir just about fitted and so I didn’t need to adjust it at all. I did find that the throttle cable and wiring to the switches wasn’t going to work in there original positions. I had to loosen the throttle cables at the engine to enable me to disconnect them at the throttle grip. Once they were disconnected I found that they were best routed on the inside of the fork, rather than the outside. I also had to re-route the cabling to the switches on the outside of the fork instead of the inside. Once everything was connected back up and I turned the bars from lock to lock, everything just about reached and the bars don’t hit the screen or tank.
 With the bars installed I then put the new Oxford heated grips on, they went on pretty easy and the installation is very simple. It is suggested they are connected direct to the battery, but other people have noticed that they do drain some power even when they aren’t switched on. So I decided to connect them to the battery via a relay that was switched in by the rear tail light circuit. At the same time I also connected in the old Autocom unit that was installed on her previous BMW F800ST.
Helen is very happy with the position of the bars on the bike and feels the riding position is now very similar to her previous bike. Lets just hope that when MOT time comes round next year that the bars pass with flying colours, as I am not too sure what the criteria for bar movement is.
While I was in the garage I also fitted some invisible film to both sides of the tank, as Helen like me has a habit of gripping the tank with her knees and potentially wearing the paint away on both sides of the tank.


1 comments:
It's better to use cabled weather stations with multiple sensors so that one can forecast weather siting in front of a monitor.It's more easier and comfortable to use I think.
Post a Comment