Showing posts with label Equipment. Show all posts

Friday, June 03, 2016

New Tyres

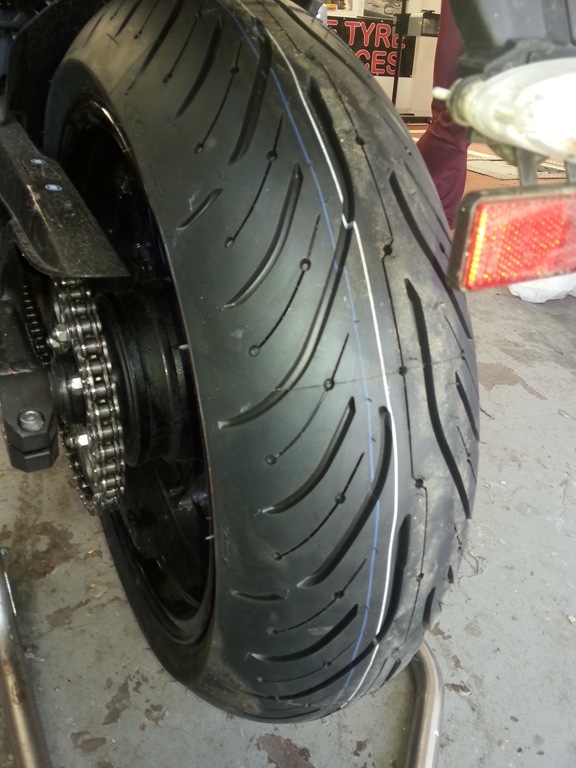
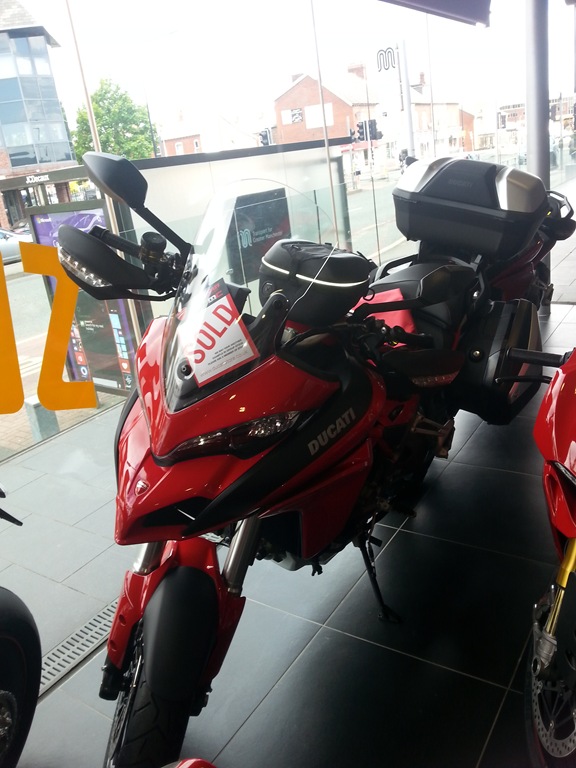
Helen and I had booked in with Matt at Bike Tyre Services on Saturday morning for a new set of Michelin Pilot Road 4’s, for our upcoming tour. While we were waiting we had decided to take out a Ducati each for a test ride as Ducati Manchester is opposite.

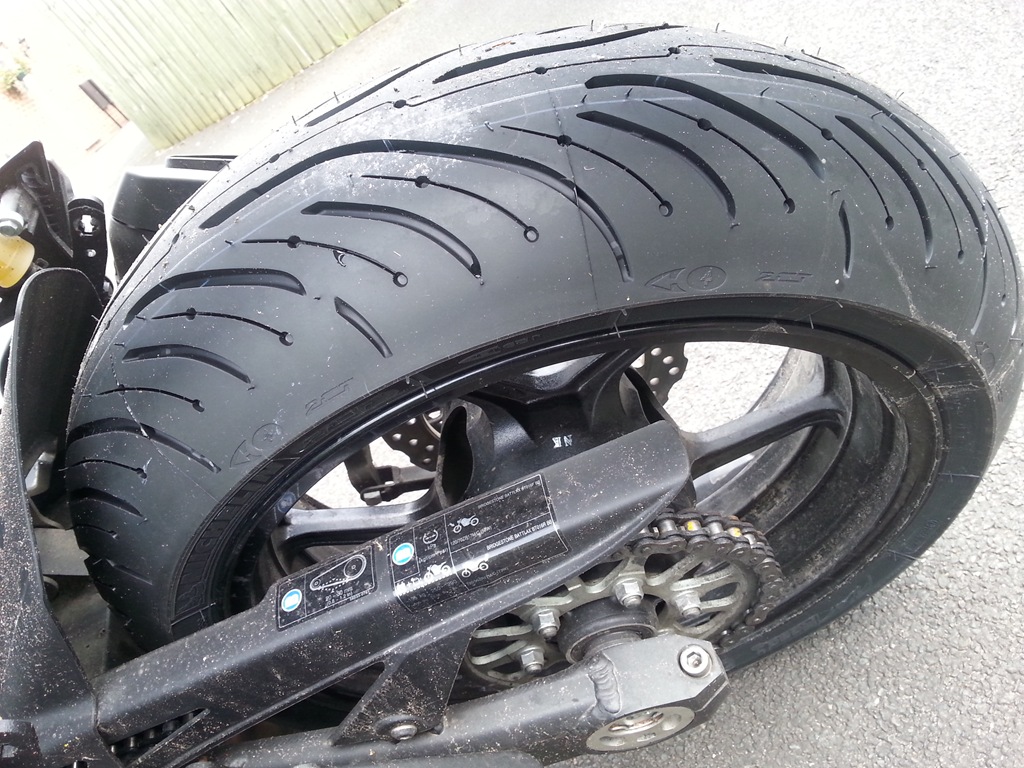
However Matt phoned up during the week and said that he had been offered a VIP package to attend the TT Superbike Race on Saturday. He said it was too good to miss for him and so as to not let us down, he would come and collect both bikes one at a time and take them back to his workshop in his van. We couldn’t really argue with that and just goes to show why we use him and will continue to do so. So as of Thursday evening we now both have a new set of tyres to scrub in. Michelin also have an offer on at the moment for £25 back on a set of tyres as well.

Read more...

Monday, May 30, 2016

New Helmet

Due to the fogging issues with my old HJC Helmet I decided for this years tour that I would get another helmet. I was unable to find the correct size helmet to try on at any of the shops/dealers we visited. So in the end I decided to give Sportsbikeshop a go as they offer free returns on helmets as long as you leave all the stickers on and just try it Shark Speed R Carbon Helmeton inside. I was very impressed with the service and the packaging of the helmet was excellent, the box it came in is designed so that you can send the helmet back in it if you don’t want it in the end.

Although I was unable to try the helmet on previously I had been able to see it in the flesh and was very happy with the look and feel of it. The quality and features also looked miles better than my current HJC Helmet. I opted for a Shark Speed R Carbon Helmet, mainly because of the weight as the HJC is very light. I unpacked the helmet and then went about wearing the helmet around the house for 30 mins periods at a time. After a week I decided that I would keep the helmet and so removed all the stickers and tags and fitted the Pinlock visor insert. The Pinlock fitted perfectly on this visor and I couldn’t see any gaps like I used to with my HJC Helmet. The visor is also much thicker than on any of my other Shark Speed R Carbon Helmetprevious helmets, it also moves in a lovely fluid motion as well. The way the locking cams work on the visor it means it is a breeze to take it off. The helmet also comes with a built in internal drop down sun visor, this works by using a lever on the top left of the helmet.

On my first test ride with the helmet I did notice a slightly annoying whistling noise that comes from the visor lift up tab. This noise goes away if you remove the soft under chin guard as you just end up with general noise then. With the chin guard removed the helmet ventilation and cooling system seemed like it would work very well in hot conditions. Overall apart from the noise I am very pleased with the helmet and will be taking it on tour with me. I have also already fitted my Autocom microphone and speakers to it.

Update: After some more testing I can honestly say that this is not a quiet helmet. It constantly sets off the microphone vox in my helmet if the chin guard is not in place. It is defiantly good for cooling but not for noise. So much so that I am going to fit the yellow inserts into my Alpine earplugs.

Read more...

Wednesday, May 11, 2016

SatNav and Autocom

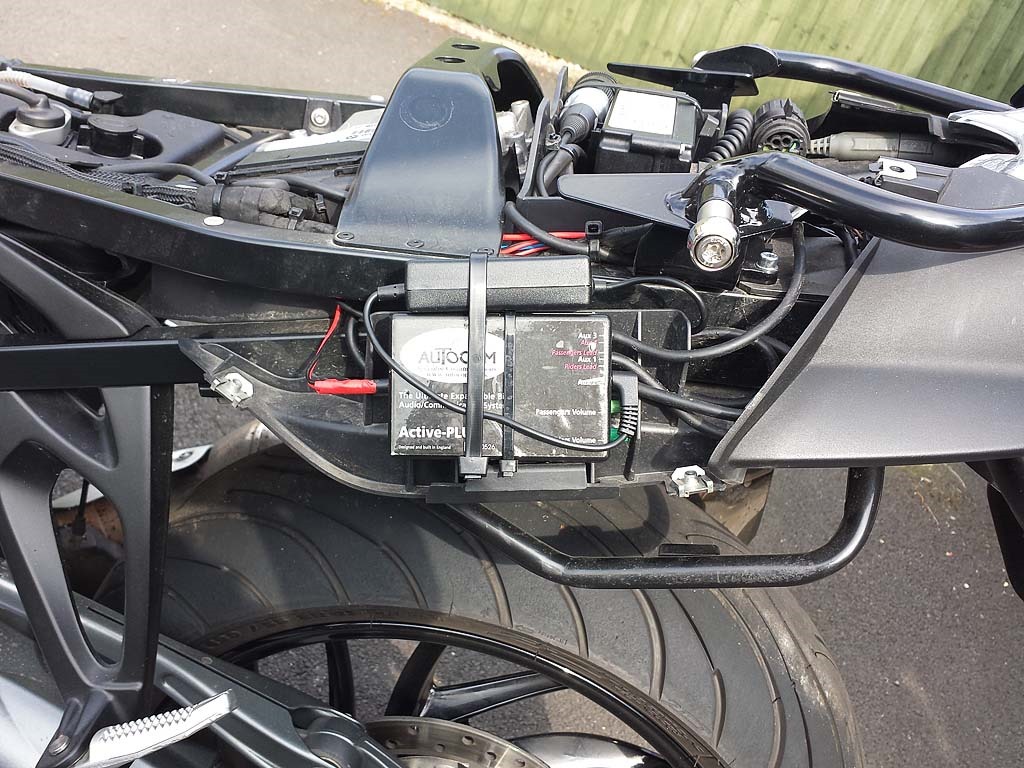
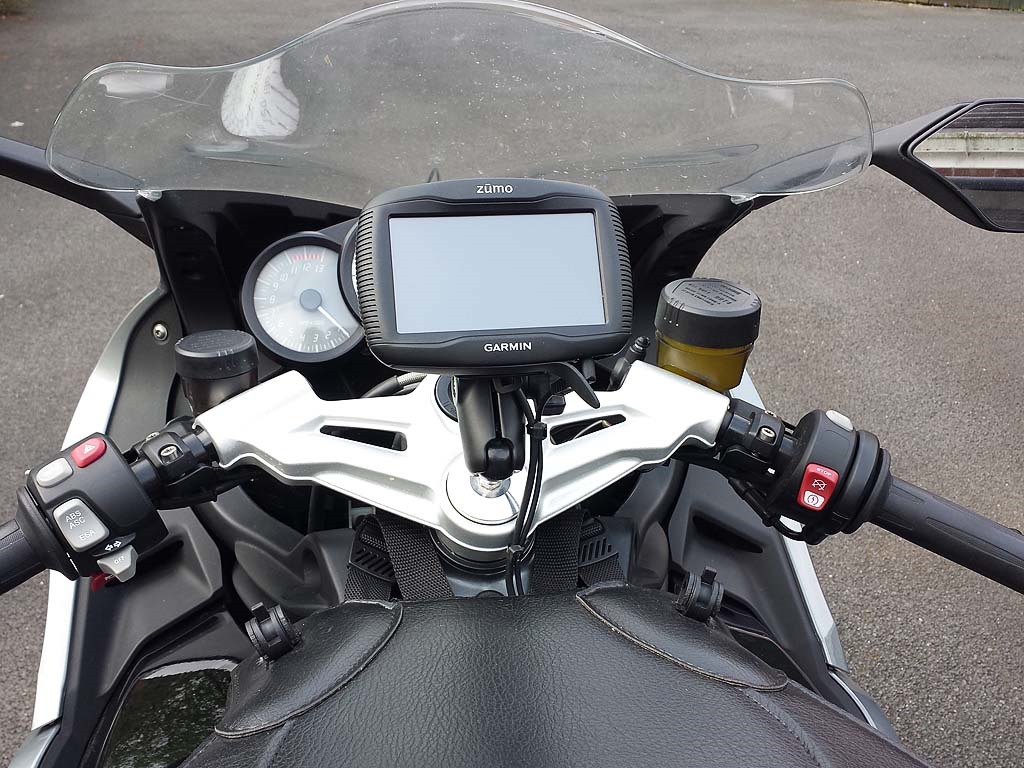
On Sunday the weather was even better so while I had the panels off already I went about installing the  Garmin SatNav mount and power unit. I also installed my Autocom unit and a bike powered Kenwood radio. I had previously installed all this before on my previous bike so I already had the cabling cut to length and a good idea of where to put everything. As I have previously gone over how I installed this on the other bike, it’s pretty pointless to write it up again so I will post the links to the relevant blog posts below. The only differences to the install this time is I didn’t install the bluetooth module, due to volume issue with the Garmin. Also rather than removing the powerlet socket to get a switched live I instead traced the cables back and spliced into the loom and soldered the cable on. I have also managed to hide the cables and connectors better so it is a much cleaner install this time. Previous knowledge and hindsight is a wonderful thing. When I tested it after the install it sounded much clearer than last time, so maybe the tidier install helped with this. Considering this is the third bike the Autocom has been on I was pleasantly surprised that it is still working perfectly.

Garmin SatNav Install
Garmin Sound Issue
Autocom Install
Revised Garmin Audio Install

Read more...

Monday, May 09, 2016

K1300S New Indicators

As the weather was nice over the weekend and now that I also have the centre stand fitted I decided to do some jobs on the K1300S.  I had decided a while back as the K1300s has so many trick bits that I would add some better looking indicators as well. I had bought the indicators and lenses last year but hadn’t got round to fitting them because of the crap weather we’ve had recently.

K1300s Front IndicatorsFor the  front indicators I decided to just fit some nice smoked lenses rather than have the standard amber ones. I got them off Ebay and they are Chinese made but because they are just lenses and have no electrical bits in them I thought it was worth a punt. Well they fit really well for aftermarket ones, the fit isn’t perfect but unless you had the OEM to compare against you wouldn’t notice really. Obviously the original bulbs are clear so I needed to get some amber ones instead. Again Ebay was the easiest place to source these and the Canbus system had no issues with the bulbs I got either.

K1300s Rear IndicatorsFor the rear indicators I chose to remove the large old style bulbous indicators and instead fit a set of cleaner looking Led indicators. I went for the official BMW indicators as fitted to the front of the K1300R and other BMWs. The front ones are shorter than the rear ones, but I needed them for the K1300S due to the way the luggage is shaped to fit around the standard indicators. The BMW part number is 63 13 8 522 499 and they are £26.60 each. However again I got them off Ebay for a lot less. I got the BMW ones as they are true plug and play and don’t upset the Canbus K1300s Rear Indicatorssystem either. All I needed to do was to locate the indicator connectors in the rear tail unit and unplug the old ones and plug in the new ones. I had to remove the rear light, rear luggage rack (grab rails on standard setup) and the black plastic cowling to get at them. But once removed actually changing over the indicators was very easy. I am very pleased with the result and I think both sets look better against the white of the bike rather than the OEM bright amber ones.

Read more...

Sunday, May 01, 2016

K1300s First Service

Well after having to cancel the service last October when my back went and then the chronic weather we have had since. I have finally been able to take my bike over to Bowker Motorrad in Preston to have the 600 mile service done and a centre stand fitted. Although after the snow on Friday morning that plan looked like it might get scuppered again. Anyway although damp when we left for Preston on Saturday morning the conditions throughout the day were mainly dry and the majority of roads dry as well. We arrived at Bowker Motorrad on time and handed the keys over to the service department. We then hit a problem as we had reserved two bikes to take out on a test ride to kill time, but had forgotten our licences. Fortunately we managed to get our licence numbers and national insurance numbers so they could do the licence check and let us out.

We took out the same K1300s Motorpsort bike as mine and the S1000R. Initially I rode the K1300s and Helen went on the S1000R. We managed to get out of Preston but it took ages even with all the filtering and headed on the A59 towards Clitheroe. We then took our usual route to Settle via Sawley and Wigglesworth. We then joined the B6479 and headed for Ribblehead Viaduct but stopped on the far side of Horton in Ribblesdale at our usual tea room for a late lunch.

Bowker BMW Test Bikes After lunch we swapped bikes and then headed back to Bowker Motorrad via pretty much the same route except we used the M65 to get into Preston on the south side instead of trying to get across from the A59 junction on the M6. The S1000R is a real hoon bike, so easy to ride and with bags of power and insanely powerful brakes. It also turns on a dime, but for me it was too easy to ride and could be very dangerous to an inexperienced rider. The seat was too hard for me and crippled my buttocks and the zero wind protection would make long rides tiring. All in all a great bike for just hooning around on, but for anything else a pretty pointless bike. On the way back Helen was keeping up with me very well, which could only mine one thing see was really enjoying the bike. When we arrived back at the dealers she announced that she loved the bike and was going to get a price to swap. To cut a long story short Bowker Motorrad have given her the keys to the bike and said bring it back by 3:30pm on Monday. So over the next to days she is going to test it a bit more and then decide whether she wants to swap. The only downside is that we will have identical bikes, which is a little sad but hey ho.

Read more...

Saturday, October 03, 2015

Stem Mount, Plates & Rear Sets

Stem Mount Yesterday I installed a stem mount on the K1300S to enable me to attach my Garmin SatNav to when I get round to installing that and the rest of the wiring for the Autocom system. I got one of the custom made mounts from Telferizer, they almost look like a factory option. The quality and look is great and it was so easy to install.

After that I decided to install some invisible film on the heal kickplates as they are renowned for scratching up very easily. I got some Auto-Protek film off Amazon, it is designed to protect paintwork from scratches and stone Healplate with Film on chips, but is perfect for this application as well. I removed the kick plates from the bike, a far harder job then is necessary due to Loctite again and the rear master cylinder on the otherside. Once removed I cut the film to suit and then installed with a slip solution. You then just squeegee out the water and bubbles, I also used a hairdryer to apply heat to help the corners stick down better. As the name suggests the film is pretty much invisible although you can see the edges if you get very close to the plates.

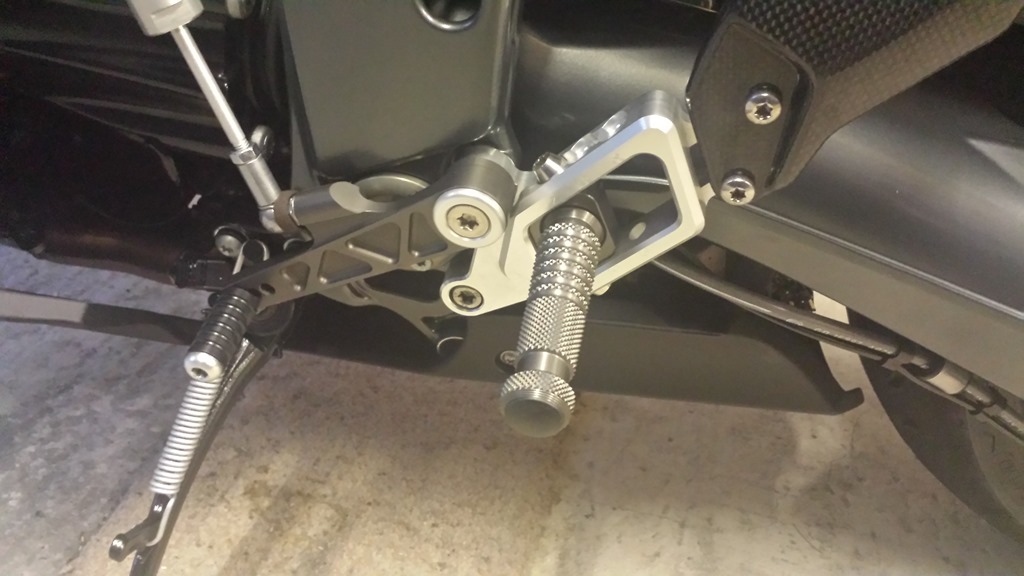
I then adjusted the position of the HP rearset pegs, they can be placed in 1 of 6 different positions. They come installed at position 1 which is the Peg in position 2 lowest, I rotated 180 degrees and installed them in position 2, which is slightly higher but no further to the rear of the bike. Again BMW have made the job much harder than needed. Green Loctite this time on the bolts, they are never going to come out. They also used Torx bolts and the frame was in the way of the top ones. So off to Screwfix to get a set of allen keys with Torx heads on them. They just about fit in to get the top bolt out, although I did have to put Duck Tape on the frame to protect it.

Read more...

Sunday, September 27, 2015

Tank Cover and Luggage Racks

Luggage Rack Today I installed my old luggage rails and SW Motech topbox racks to the bike. I had learned from posts on the forums that getting the grab rail bolts out can be problematic due to BMW using red Loctite on the bolts. Some people have also had the issue of the nut welded onto the inside of the frame coming loose and just spinning with the bolt. As I undid the bolts some of them just grabbed and seemed very stiff. I used some WD40 and then tightened the bolts back down. I did this several times and eventually the bolts came free enough for me to happily undo them completely. I then cleaned the bolts up that I was reusing and then reinstalled with some copper grease for ease of extraction next Bagster Tank Cover time, I hardly think they are going to vibrate loose. The only bolts that I did put Blue Loctite on was the ones holding the topbox plate on, as these do vibrate loose.

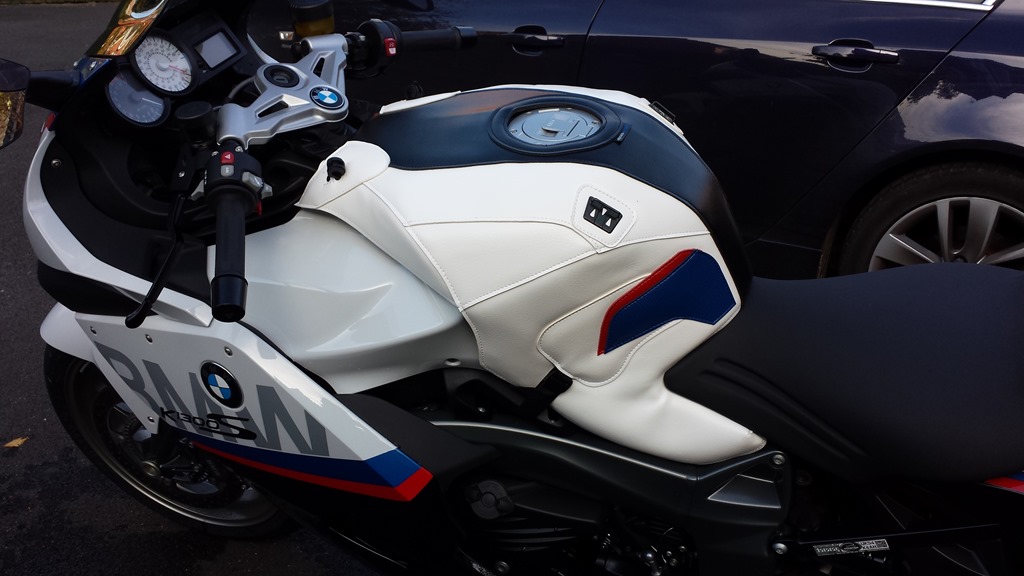
I then set about installing my new Bagster tank cover that I got off Ebay. Bagster don’t actually list my cover on their website but they do make one for the motorsport edition. It isn’t a perfect colour match as the black near the seat area is missing and it is just all white. But for someone like me who is very good at wearing tanks away with knees and crotch it is a no brainer. The added benefit of being able to attach a tank bag is a bonus, you can also use the front clips for putting you helmet D-Ring on when resting it on your tank.

Read more...

Saturday, September 26, 2015

New Bike Collected

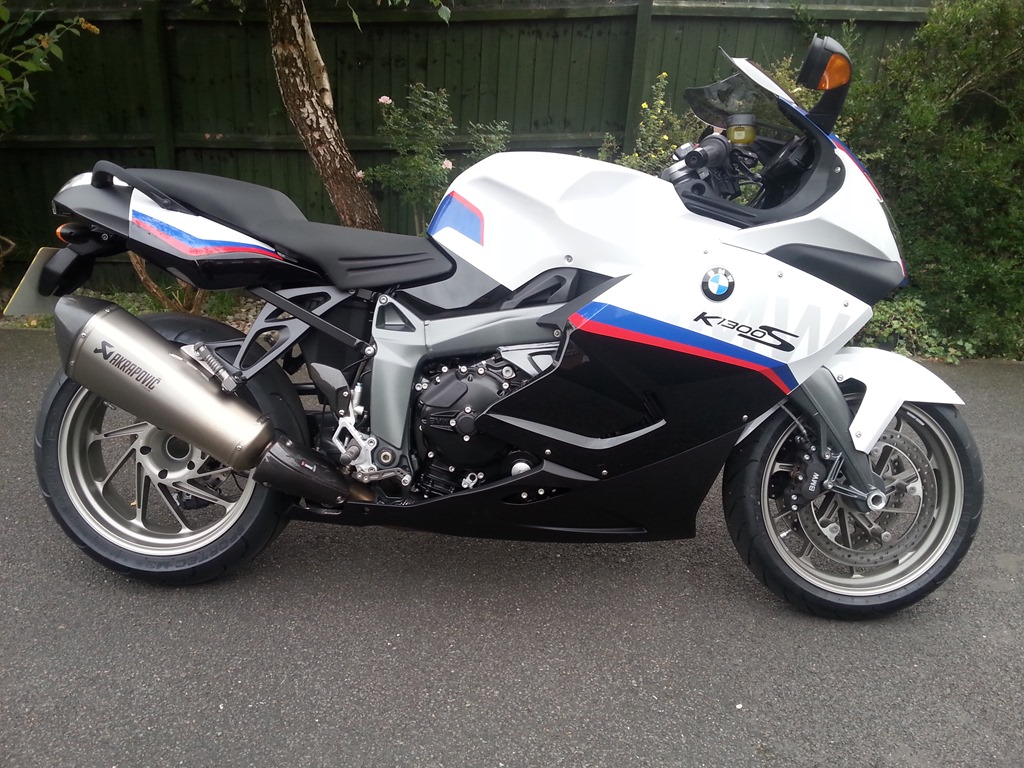
We went over to Southport Superbikes today to pick up my new bike. On my way over I monitored the temperature gauge on my bike to see if it was running hotter than other K1300S’s. We arrived and parked up and Kirk was K1300S Motorsport very happy to see us. I signed the relevant forms and then took charge of my new bike. We headed off back home via Croston and the Grane Road so I could get a feel for the new bike and to help scrub in the tyres a bit. The bike ran far cooler than my old one and it also turned in much quicker and easier. I don’t know whether that is because of the lighter HP forged wheels or the 190 rear. Anyway I am very pleased with the bike and the extra bits that come with this special edition really set it off. I also decided straight away to remove the baffle from the Akrapovic exhaust, before the constant heat makes it hard to remove in the future.

Read more...

Monday, September 14, 2015

New Bike Ordered

After Williams poor offer I rang around some of the other dealers to see what deal they could do. They all offered a better deal than Williams did, but fortunately we where able to track down Kirk who used to work at Williams and who we have know for around 8 years. The salesman at Williams foolishly told us that he had gone over to Bowker, who are opening a new 1.5 million showroom on Preston Docks. That site only opens in October but we tried Southport Superbikes who they bought and are transferring to the new site in Preston. We phoned them up and asked if Kirk was there and to our surprise he was. We soon got talking and he did me a great deal over the phone and so I put some money down to secure a new K1300S Motorsport.

Read more...

Sunday, June 07, 2015

New Tyres

Yesterday Helen and I went over to bike tyre services in Sale to get a new set of tyres each for our upcoming tour. As usual we opted for Michelin Pilot Road 4 tyres as we are happy with their wear, also their grip in the dry and especially the wet. While we waited for the tyres to go on Pilot Road 4 on Helen's Z1000SX we nipped over to Ducati Manchester to have a look at the new Multistrada. To Helen’s surprise the new bike has a more contoured seat and on its lowest setting Helen can get her feet down almost flat. So the Multistrada has now become a potential next bike for her.

After we had the tyres fitted we headed over to Williams BMW in Trafford as I wanted a mechanic to have a look at a photo of my throttle cable. After a discussion I am pretty much resigned to the fact that I will need a new set of throttle bodies to fix my low revs issue. Apparently it is a different issue to the K1200 and is actually caused by the butterflies moving and sticking on the inside of the throttle inlets. Also while we where there Helen had a look at the S1000XR and the R1200RS. She actually preferred the look and feel of the R1200RS. We have decided once we get back off tour to take both of them out so she can have a  test of each of them. Also BMW being BMW tried to sell me a new K1300S Motorsport rather than me having mine fixed. It is a great looking Multistrada with luggagebike and I am certainly interested but will wait till we get back off tour. The question then will be to get the valve check done on my bike our to get a new one.

After a quick coffee and biscuits at Williams BMW we headed to the Dale to scrub in our new rubber. We just went for a quick run to Hawes and back via our usual route of Sabden, Sawley, Wigglesworth, Settle and Ribblehead Viaduct. To say it was a bit windy would be an understatement, I can just imagine how bad it would have been on the mountain course and think it was a very wise idea to cancel any TT action on Saturday. The new tyres were as sure footed as ever and we even managed to get them to near the edges on our first real heat cycle.

After getting home I went on Ebay and have managed to source a used set of throttle bodies for under £100 off a 2010 10,000 mile K1300S, much better than the £700 for a new set. I am not going to fit them before we go in case I encounter any issues while fitting them. Especially as I will have to undo near on 15 of those locking hose clips that BMW like to use.

Read more...

Saturday, May 02, 2015

Helmet Visor and Microphone

As previously discussed I have had numerous issues with the Pinlock visor insert on my HJC R-PHA10 Ben Spies Limited Edition helmet. I have gone through 3 of them now on both the clear and light smoke visors that I have. They have all work for a brief time than they develop a small gap and start moving about and actually then scratch the inside of the visor. Due to me actually liking the helmet otherwise, I decided to get a new light smoke visor and try Muc-Off Anti-Fog Treatment instead. I am happy to report that it seems to work really well and I didn’t have any fogging issues on a recent ride, when Helen experience some with her own Pinlock insert on her Shoei helmet.

On our tour last year my Microphone got very wet going through Andorra and then started to play up for the rest of the tour. So I decided to get a replacement microphone to see if that was the actual issue with my Autocom system. The microphone I got was slightly different from the original and is in my opinion far better as well. The boom is far more flexible and holds its position so I can position in front of my mouth rather than having to velcro it to the helmet chin bar. The microphone worked great although it is now setting off the Vox with wind noise, so I might need to adjust the Vox setting, not easy because of my install.

Read more...

Thursday, September 11, 2014

Z1000SX Puig Screen

For Helen’s birthday I got her a new Puig Dark Smoke Screen for the Z1000SX. It was very easy to fit and all the holes lined up perfectly so it was easy to reuse the original OEM screws andZ1000SX Puig Screen washers. The screen looks like a quality  item and not the plastic crap that some manufacturers make. Like the Airblade screen that I had on the ZX-9R. Anyway the Puig screen has been tapered so that you can still use the screen adjuster to change the position, if you so wish. Helen just has it set at its tallest settings which helps keep the wind and flies off her helmet better. She also thinks that the dark smoke really complements the black of the bike and not a bit of an eyesore like the old clear one.

Read more...

Tuesday, June 10, 2014

Tyres, Setup, Scrubbing

Helen and I had new tyres fitted over the weekend. We had booked it far in advance to make sure we could get the tyres we wanted in time. We had ordered Michelin Pilot Road 3 tyres but he was unable to get a rear for my BMW as it has an odd size 190/55/17. So in the end we both opted to have the new Michelin Pilot Road 4 tyre fitted instead. They are slightly harder in the middle but the softer compound is much nearer the middle than on previous tyres. They have also reduced the amount of tread pattern near the edge of the tyre to give a larger rubber contact area for more grip. They have assumed that most people will not be using big lean angles in the wet. 

Unfortunately on Saturday the weather was awful with heavy downpours and thunder and lighting. We didn't really have much choice other than to go for the tyres. We only had to go round on the motorway so didn't expect too many problems. We had to filter for a bit around the Trafford Centre but otherwise it was ok and by the time we got to the tyre place the rain had stopped. While the tyres were being fitted we had a quick look in Ducati Manchester and had a coffee at a local cafe. The visit to Ducati confirmed to Helen that the Multistrada is to tall for her to feel comfortable with.

Helen's New Rear TyreWe had a little bonus when we came to pay as we found out Michelin are currently offering £25 cashback on a set of tyres. The offer runs through to the end of July, so if your after a set of tyres you might want to get them soon. As we left Sale and headed for our next stop in Atherton it started to rain heavily again. We were heading over to Kais Performance to have Helen’s suspension setup as she felt it wasn’t setup correctly for her. Again we had to filter past the Trafford Centre but we weren’t held up too badly. We arrived at Kais Performance and they promptly set about sorting it out, he said that it was setup too soft and was possibly hitting the bump stop. He also said the damping at the shock was pretty much set at its limit as the factory shock isn’t great, this I was already aware of. He also advised that with the luggage on the rear would probably drop about 10mm which would equate to 2 turns on the preload at the rear shock (We bought a nice Ohlins C-Spanner for the job). After that we headed back home in the rain again and had to filter for a while at the end of the M61 as more people were trying to get to the Trafford Centre.

The weather had picked up by Sunday so we decided to give the bikes a quick round around the Moors to give the tyres a scrubbing in cycle for our upcoming tour. The tyres felt pretty similar to the previous Road 3s we have had. They performed excellently in the wet yesterday and they seemed fine in the dry as well. Nice turn in and seemed to have plenty of grip only time will tell but first impressions are positive. They are also supposed to last longer as well, my bike was on 11,600 miles and Helen’s was on 1600 miles when they were fitted. The general problem with have with tyres though is that we usually have to change a set of part worn tyres as we are never sure if they will last for our upcoming tour. Which is exactly what happened last year to Helen’s rear tyre on the abrasive asphalt in the Vosges.

Read more...

Sunday, May 18, 2014

Late Dales Run

Yesterday we went out at around lunchtime for a quick run to Hawes and back. I had intended to watch the online streamed coverage of the Northwest 200. But although the weather here was superb, they were one of the few places in the UK to have rain. I watched one race and the other had been put back a bit so we decided to go out on the bikes instead, as Helen was keen on trying out her new gel seat and we needed to test the new Autocom leads as well.  We left home and headed straight for Settle on our usual tried and tested route. To our horror we discovered that they have started to resurface the road from Wigglesworth to Settle. Horton Lunch StopWhen I say resurface what I actually mean is throw done gravel and tar and expect the passing traffic to finish it off. This is not a major route so I expect that we will have to take it easy on this stretch for a good few months. We then headed for lunch at our usual tearooms in Horton-in-Ribblesdale. When we pulled up we got talking to a guy on an Aprilla who had broken down and been waiting for 2 hours already. His breakdown cover was with MCE as part of his policy.

After lunch we headed to Hawes and then headed back home the same way we had come. The good news is that the new Autocom leads have fixed all of our problems and the audio and bike to bike comms is better than it has been in ages. If your Autocom is giving you issue it might be worth checking this lead out first. The other good news is that the gel seat worked wonders for Helen. She also noticed the seat was slightly raised at the front which also meant that she didn’t feel like she was being lent forward towards the tank. So all in all the seat is an expensive cure to the issues she was having.

Read more...

Friday, May 16, 2014

Z1000SX Gel Seat

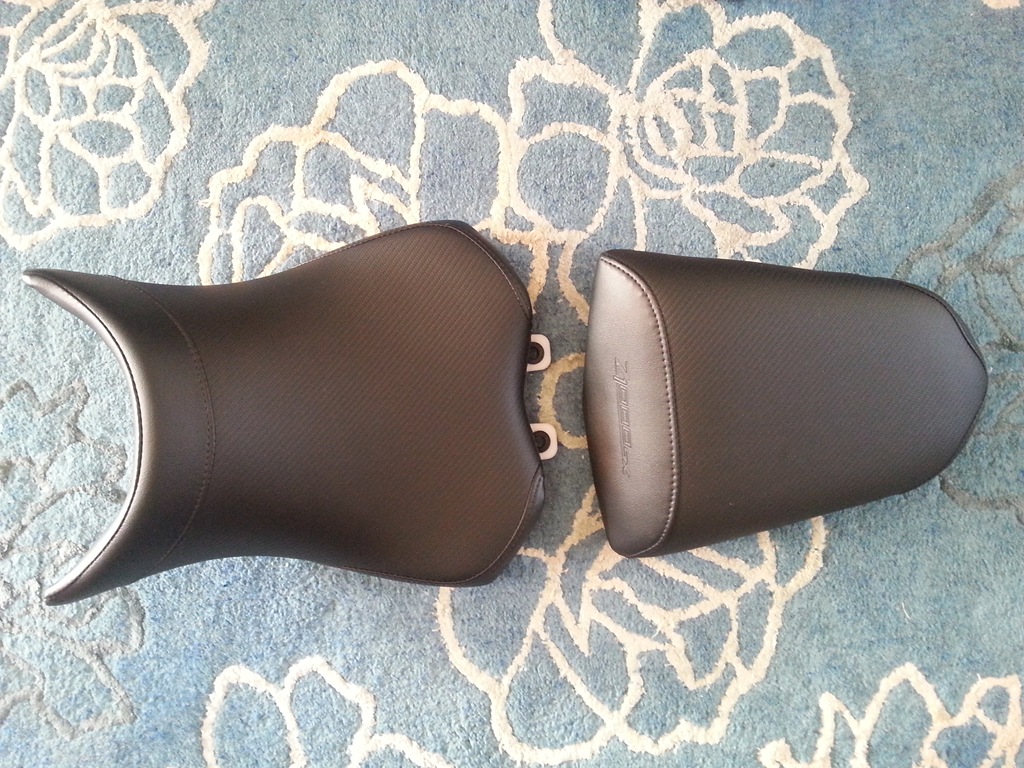
Helen has has just bought a genuine Kawasaki gel seat for her Z1000SX. She decided to buy one after our ride last weekend as going over all the bumps really hurt her backside. Hopefully the gel seat will cure this and she will not get any further problems like this. The big test will come when we go on our 2 week tour of the Pyrenees. Z1000SX Gel Seat

Read more...

Sunday, May 04, 2014

Z1000SX Autocom Install

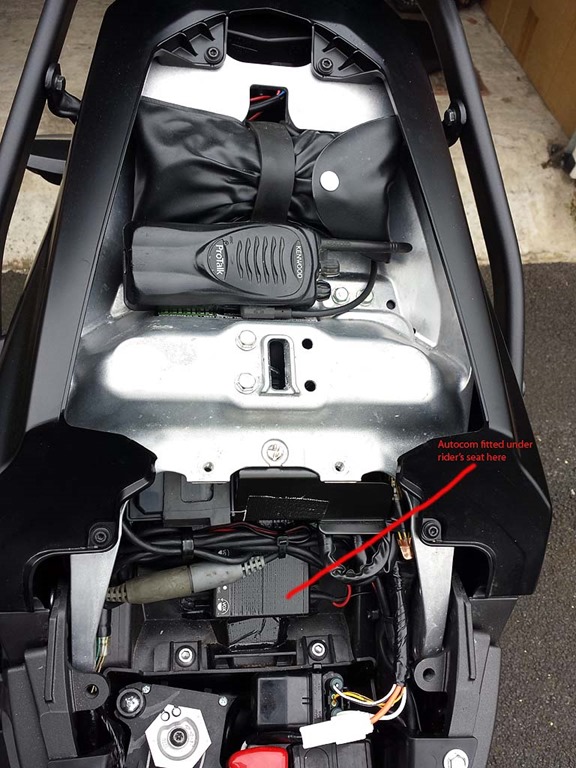
Today I installed Helen’s old Autocom unit on the her new Z1000SX. There is only one place you can really install it, if you still want access to the unit for adjustment and that is in the space behind the battery under the rider’s seat. The only downside to this location is there are no holes are anything else to secure the unit to. This meant that it had to be stuck down onto the flat plastic directly. At first I tried some glue on the old Velcro faster but that didn’t work. In the end I stuck it down (doubled over underneath unit) with some black Duck Tape and Z1000SX Autocom Install then for added security also put some over the top as well. I had previously checked that the radio would fit under the pillion seat so the cable to it had already been routed through to that location. So all I needed to do was connect up the positive, negative and route the main rider headset wire.

I spliced into the rear taillight circuit and solder the positive wire to it at the rear of the bike. You will find a 3 pin connector at the rear of the bike with Red, Black/Yellow, Blue coloured cables at it. The Red wire is the positive supply for the light, obviously it is switched on with the ignition. I connected the Negative wire directly to the battery, you always need to do this on Autocom systems otherwise you will get engine noise interference. I then routed the rider’s headset lead alongside the battery to the petrol tank and left it sticking out under the left front side of the rider’s seat. Then I put everything back together and it worked as it should. I have noticed that both of the leads that connect in between our helmets and this connector are a bit dodgy. Wiggling them causes them to crackle or not work all together. The wires internally have obviously been damaged by the constant bending and twisting of the cable. So I have ordered two new cables at £15.00 each.

Read more...

Saturday, May 03, 2014

Pacsafe Lidsafe

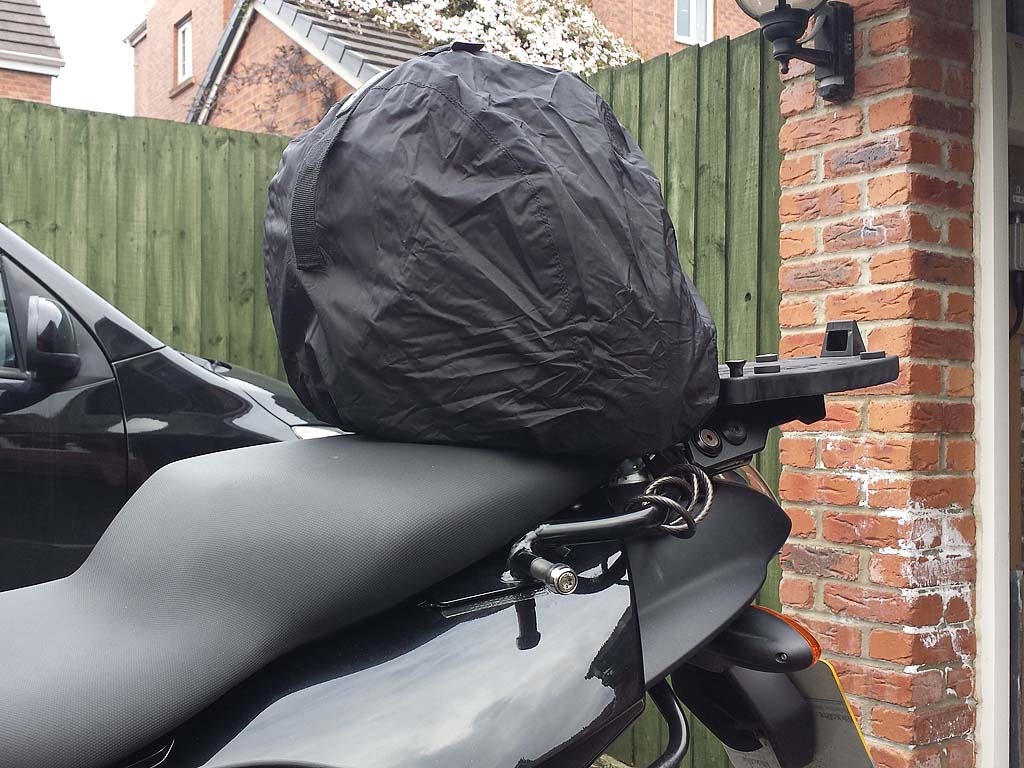
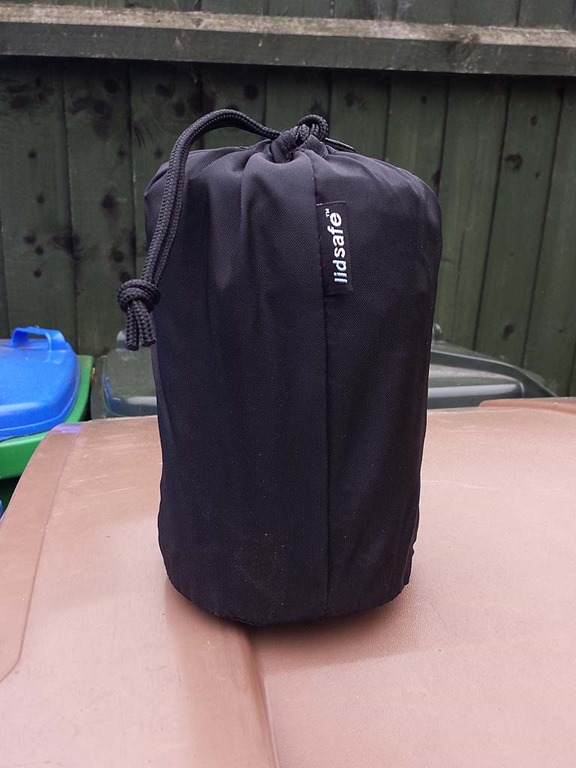
Pacsafe Lidsafe01We have recently purchased a pair of Pacsafe Lidsafe bags to put our helmet’s in when we are away from the bikes. We will only likely use them when we are touring and the topboxes are full. We felt we needed to buy these as we love our Pacsafe Stuffsafe and neither of our bikes have helmet hooks fitted to them. There is nothing worse than having to lug all your bike gear with you when you go and visit a castle in the hot sun. 

Helen’s Z1000SX doesn’t have any hooks under the seat and my K1300S hooks were part of the rear grab handles. These handles were removed when I fitted the topbox rack. Last year Pacsafe Lidsafewe were able to use the hooks under the seat on Helen’s old VFR. But obviously the helmets will be far safer in these bags with the eXomesh® protection and on the plus side they will also now be in a waterproof bag. They pack down to around the size of a pint glass and don’t really weigh anything ever. They will easily fit in our topboxes and also help stop gear in the topboxes moving around. It would appear that both of these products are now discontinued so if you want either I would buy them now while you still can.

Read more...

Garmin Audio

Autocom Unit Although it was nice and sunny today I decided to do some work on my bike rather than go out for a ride.

So I installed the audio lead from the Garmin audio out jack to my Autocom. Before I installed it I checked to make sure that it worked first and that no bike noise was induced into my headphones. All worked well so I went about stripping the bike down and removing the petrol tank again as well. The install went ok and the new lead was plenty long enough to route around the bike. I managed to install the lead’s isolation box on top of the Autocom unit, it just fitted in. I then put the bike back together and all seems to work perfectly and the volume is just right. The minor downside is that the install at the Garmin end isn’t as neat as it was before, but at least I have sound now.

Satnav MountI also installed the slightly larger Ram mount bracket that I used to use with my TomTom satnav. This has lifted the Garmin slightly higher up and in my opinion is a much better location as I don’t have to look down as much. The dials are all still perfectly visible as well over the top of the Garmin, so it is a win win situation all round.

Read more...

Saturday, March 15, 2014

BMW Launch, Hawes & Garmin

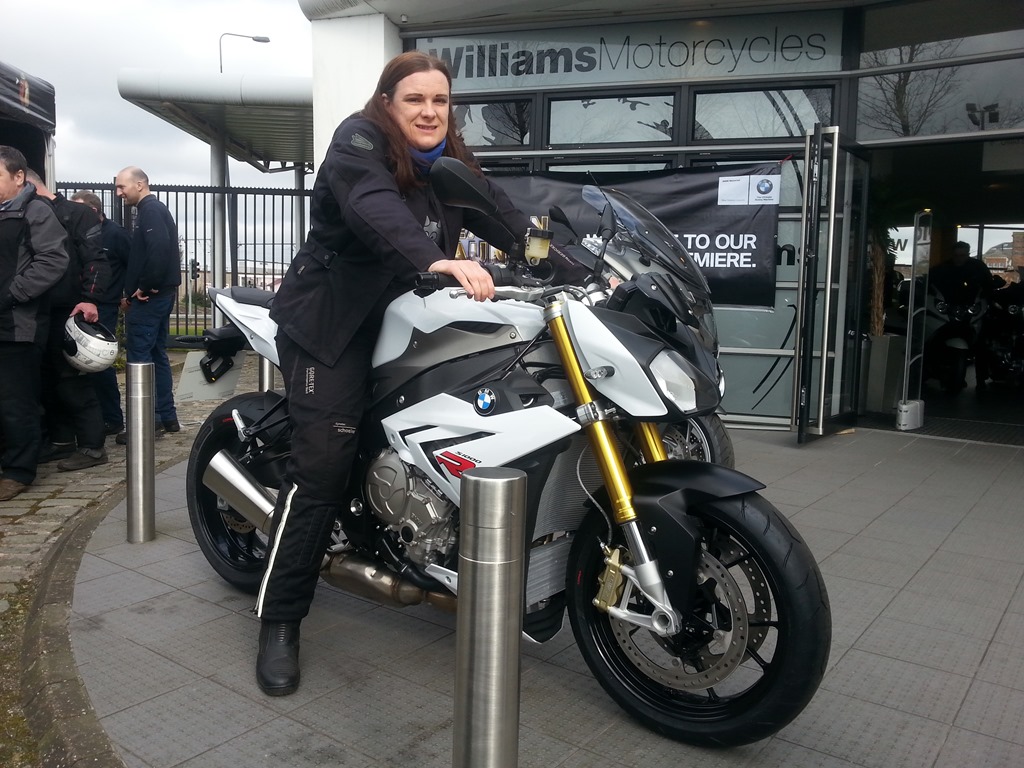
Today we visited the BMW launch event at Williams BMW in Manchester. It was very busy but we were able to get a look and sit on the new S1000R. I was also able to get to grips with two other K1300s bikes and found both of their throttles to be smooth in operation. Mine has a real bad notchy feel as you initially turn the throttle. Could this be one of the cables or the grip itself? When I install the new audio wire for the SatNav comms, I think I will have a look at this and the throttle bodies again. This time I will also take the airbox off and actually look inside the bodies at the butterflies as well.
Helen on S1000R After a free coffee and a Bockwurst in a bap with headed for Clitheroe and the Yorkshire Dales. We had a run up to Hawes and back on our usual route via Sabden, Sawley, Wigglesworth, Settle and Ribblehead Viaduct. We stopped just outside Horton-in-Ribblesdale at our usual tearoom stop. We prefer to stop here these days as it is usually very quiet and the owner is very welcoming. No major issues to report, the K1300s performed brilliantly with no hint of a sticking throttle. Helen was a bit rusty at first, but soon got the hang of her S1000SX. We had a nice quiet ride, more cars than bikes were out today around the Dales.

My first opinion of the Garmin 350LM is a good one although there are things that I don’t like. Currently the unit is mounted a little bit too low for me and I find I have to really take my eyes off the road to see it. Obviously when I get the sound working I won’t have to do this as much. But I think I will install my other Ram Mount double ball clamp bracket as it is a little bit longer. The SatNav is very easy to use with a glove and ever button/icon I pressed on screen I hit first time everytime. It followed the route I had plotted on Basecamp to the letter and when I made a slight detour it was able to recalculate a route to get me back on track, without backtracking. One slight annoyance is that it gives you the distance to your final destination not one of the set points I had made on route. This information is stored on the trip/stats screen instead, which is a quick button press away though. I don’t like the 3D map view the Garmin uses I much prefer TomToms approach. Also TomTom gives you a much better idea of the severity of corners, Garmin seems to flatten them out more. I did notice that some sharp turns it actually thinks are junction turns and navigates as such. Not sure what the vocal command is though as I don’t have sound yet. I will have to wait till I have sound enabled to my helmet before a can make a proper judgement on the SatNav overall.

Read more...
Friday, March 14, 2014

MOT & Garmin SatNav

I took the K1300s for its MOT yesterday to Bikes and Beyond in Shaw. I chose this place as it is run by bikers and also enabled me to give the bike a bit of a run on the way there. The throttle behaved perfectly on our drive and also just before I arrived for the MOT. However the problem did rear its ugly head during the MOT test but he passed the bike anyway and just said keep an eye on it (it was only catching slightly and not sticking for long). Then once I had got home I again was unable to replicate the problem.

Once home I decided to connect the SatNav up to the Bluetooth module of my Autocom unit. The SatNav found the Bluetooth module and connected. However I then found a massive issue with the SatNav. The volume was far too low and there is no way of adjusting it on the SatNav, it says to adjust the sound on your headset. Erm well you can’t do that on the Autocom system, TomTom allow you to change the volume. This is a massive glaring oversight on Garmin’s part, if I had known this I probably would have gone with the TomTom Rider instead. Fortunately the Garmin does have an audio jack at the bottom of the unit so I will be able to hardwire the sound into the Autocom.

Read more...