Showing posts with label Modifications. Show all posts

Wednesday, May 11, 2016

SatNav and Autocom

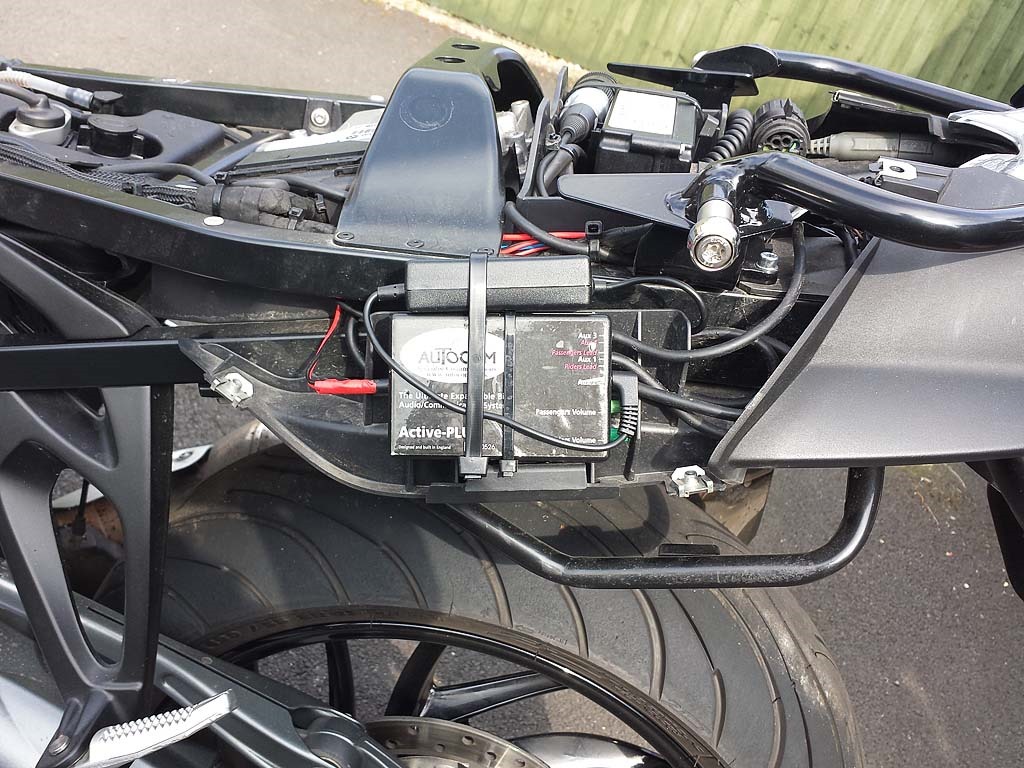
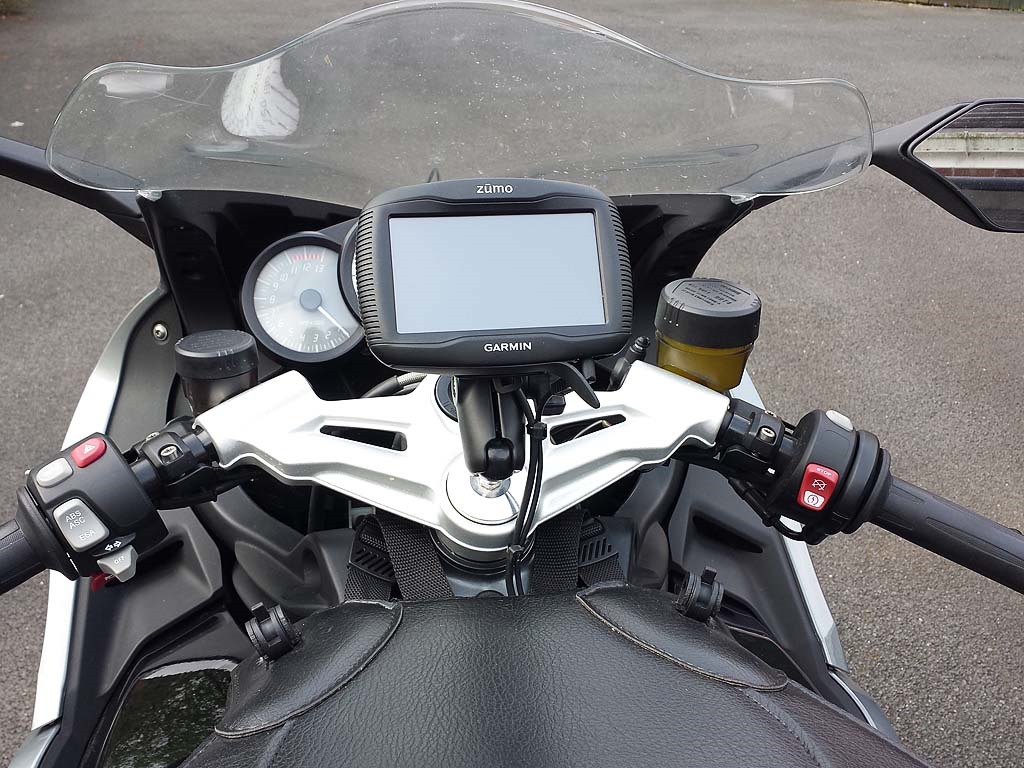
On Sunday the weather was even better so while I had the panels off already I went about installing the  Garmin SatNav mount and power unit. I also installed my Autocom unit and a bike powered Kenwood radio. I had previously installed all this before on my previous bike so I already had the cabling cut to length and a good idea of where to put everything. As I have previously gone over how I installed this on the other bike, it’s pretty pointless to write it up again so I will post the links to the relevant blog posts below. The only differences to the install this time is I didn’t install the bluetooth module, due to volume issue with the Garmin. Also rather than removing the powerlet socket to get a switched live I instead traced the cables back and spliced into the loom and soldered the cable on. I have also managed to hide the cables and connectors better so it is a much cleaner install this time. Previous knowledge and hindsight is a wonderful thing. When I tested it after the install it sounded much clearer than last time, so maybe the tidier install helped with this. Considering this is the third bike the Autocom has been on I was pleasantly surprised that it is still working perfectly.

Garmin SatNav Install
Garmin Sound Issue
Autocom Install
Revised Garmin Audio Install

Read more...

Monday, May 09, 2016

K1300S New Indicators

As the weather was nice over the weekend and now that I also have the centre stand fitted I decided to do some jobs on the K1300S.  I had decided a while back as the K1300s has so many trick bits that I would add some better looking indicators as well. I had bought the indicators and lenses last year but hadn’t got round to fitting them because of the crap weather we’ve had recently.

K1300s Front IndicatorsFor the  front indicators I decided to just fit some nice smoked lenses rather than have the standard amber ones. I got them off Ebay and they are Chinese made but because they are just lenses and have no electrical bits in them I thought it was worth a punt. Well they fit really well for aftermarket ones, the fit isn’t perfect but unless you had the OEM to compare against you wouldn’t notice really. Obviously the original bulbs are clear so I needed to get some amber ones instead. Again Ebay was the easiest place to source these and the Canbus system had no issues with the bulbs I got either.

K1300s Rear IndicatorsFor the rear indicators I chose to remove the large old style bulbous indicators and instead fit a set of cleaner looking Led indicators. I went for the official BMW indicators as fitted to the front of the K1300R and other BMWs. The front ones are shorter than the rear ones, but I needed them for the K1300S due to the way the luggage is shaped to fit around the standard indicators. The BMW part number is 63 13 8 522 499 and they are £26.60 each. However again I got them off Ebay for a lot less. I got the BMW ones as they are true plug and play and don’t upset the Canbus K1300s Rear Indicatorssystem either. All I needed to do was to locate the indicator connectors in the rear tail unit and unplug the old ones and plug in the new ones. I had to remove the rear light, rear luggage rack (grab rails on standard setup) and the black plastic cowling to get at them. But once removed actually changing over the indicators was very easy. I am very pleased with the result and I think both sets look better against the white of the bike rather than the OEM bright amber ones.

Read more...

Saturday, October 03, 2015

Stem Mount, Plates & Rear Sets

Stem Mount Yesterday I installed a stem mount on the K1300S to enable me to attach my Garmin SatNav to when I get round to installing that and the rest of the wiring for the Autocom system. I got one of the custom made mounts from Telferizer, they almost look like a factory option. The quality and look is great and it was so easy to install.

After that I decided to install some invisible film on the heal kickplates as they are renowned for scratching up very easily. I got some Auto-Protek film off Amazon, it is designed to protect paintwork from scratches and stone Healplate with Film on chips, but is perfect for this application as well. I removed the kick plates from the bike, a far harder job then is necessary due to Loctite again and the rear master cylinder on the otherside. Once removed I cut the film to suit and then installed with a slip solution. You then just squeegee out the water and bubbles, I also used a hairdryer to apply heat to help the corners stick down better. As the name suggests the film is pretty much invisible although you can see the edges if you get very close to the plates.

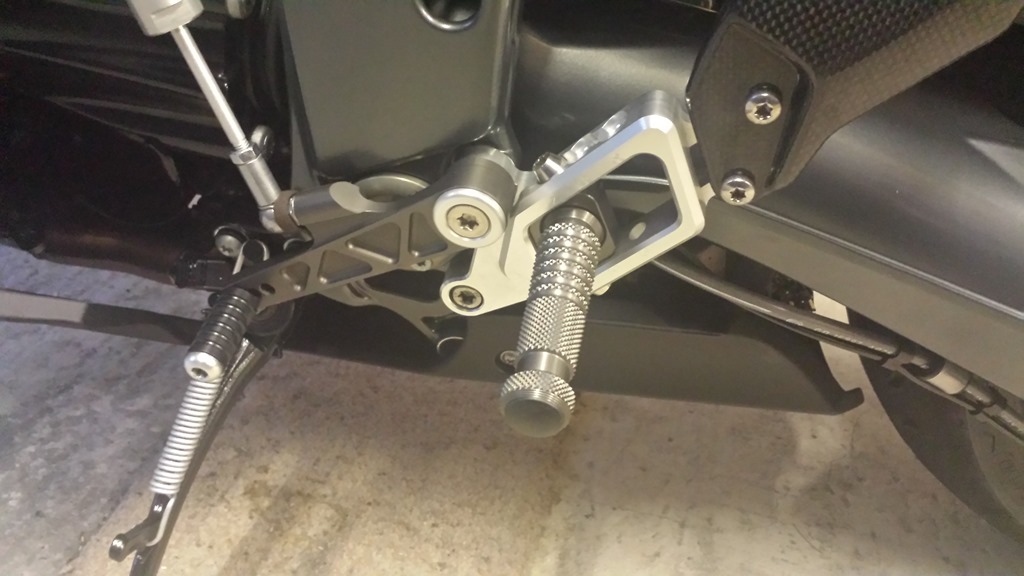
I then adjusted the position of the HP rearset pegs, they can be placed in 1 of 6 different positions. They come installed at position 1 which is the Peg in position 2 lowest, I rotated 180 degrees and installed them in position 2, which is slightly higher but no further to the rear of the bike. Again BMW have made the job much harder than needed. Green Loctite this time on the bolts, they are never going to come out. They also used Torx bolts and the frame was in the way of the top ones. So off to Screwfix to get a set of allen keys with Torx heads on them. They just about fit in to get the top bolt out, although I did have to put Duck Tape on the frame to protect it.

Read more...

Sunday, September 27, 2015

Tank Cover and Luggage Racks

Luggage Rack Today I installed my old luggage rails and SW Motech topbox racks to the bike. I had learned from posts on the forums that getting the grab rail bolts out can be problematic due to BMW using red Loctite on the bolts. Some people have also had the issue of the nut welded onto the inside of the frame coming loose and just spinning with the bolt. As I undid the bolts some of them just grabbed and seemed very stiff. I used some WD40 and then tightened the bolts back down. I did this several times and eventually the bolts came free enough for me to happily undo them completely. I then cleaned the bolts up that I was reusing and then reinstalled with some copper grease for ease of extraction next Bagster Tank Cover time, I hardly think they are going to vibrate loose. The only bolts that I did put Blue Loctite on was the ones holding the topbox plate on, as these do vibrate loose.

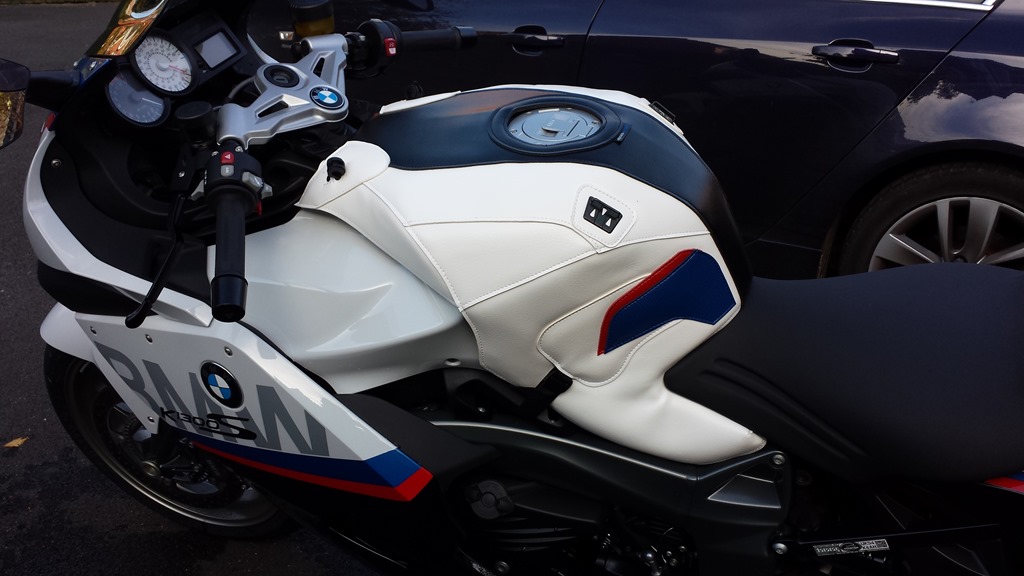
I then set about installing my new Bagster tank cover that I got off Ebay. Bagster don’t actually list my cover on their website but they do make one for the motorsport edition. It isn’t a perfect colour match as the black near the seat area is missing and it is just all white. But for someone like me who is very good at wearing tanks away with knees and crotch it is a no brainer. The added benefit of being able to attach a tank bag is a bonus, you can also use the front clips for putting you helmet D-Ring on when resting it on your tank.

Read more...

Thursday, September 11, 2014

Z1000SX Puig Screen

For Helen’s birthday I got her a new Puig Dark Smoke Screen for the Z1000SX. It was very easy to fit and all the holes lined up perfectly so it was easy to reuse the original OEM screws andZ1000SX Puig Screen washers. The screen looks like a quality  item and not the plastic crap that some manufacturers make. Like the Airblade screen that I had on the ZX-9R. Anyway the Puig screen has been tapered so that you can still use the screen adjuster to change the position, if you so wish. Helen just has it set at its tallest settings which helps keep the wind and flies off her helmet better. She also thinks that the dark smoke really complements the black of the bike and not a bit of an eyesore like the old clear one.

Read more...

Saturday, May 03, 2014

Garmin Audio

Autocom Unit Although it was nice and sunny today I decided to do some work on my bike rather than go out for a ride.

So I installed the audio lead from the Garmin audio out jack to my Autocom. Before I installed it I checked to make sure that it worked first and that no bike noise was induced into my headphones. All worked well so I went about stripping the bike down and removing the petrol tank again as well. The install went ok and the new lead was plenty long enough to route around the bike. I managed to install the lead’s isolation box on top of the Autocom unit, it just fitted in. I then put the bike back together and all seems to work perfectly and the volume is just right. The minor downside is that the install at the Garmin end isn’t as neat as it was before, but at least I have sound now.

Satnav MountI also installed the slightly larger Ram mount bracket that I used to use with my TomTom satnav. This has lifted the Garmin slightly higher up and in my opinion is a much better location as I don’t have to look down as much. The dials are all still perfectly visible as well over the top of the Garmin, so it is a win win situation all round.

Read more...

Monday, December 02, 2013

Helen’s New Luggage Rack

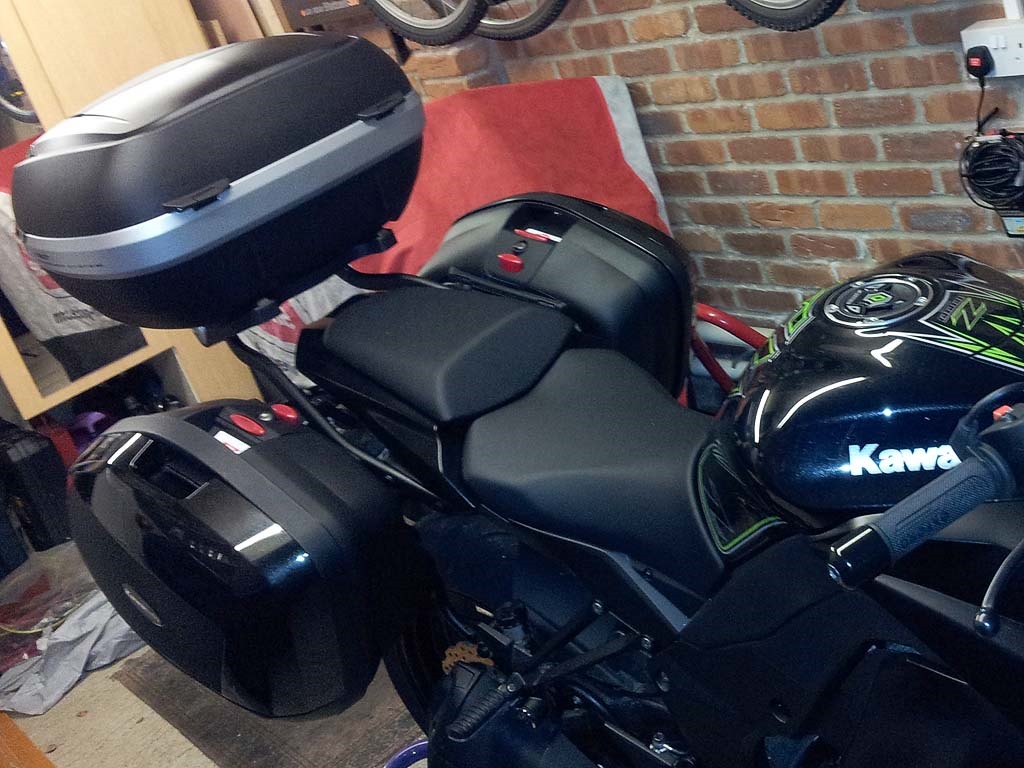
Yesterday I fitted Helen’s new Givi pannier rails and top box rack. Kawasaki don’t offer the option of a 3 box setup, you either have panniers or a top box but not both. Helen got the bike from Kawasaki with the panniers already fitted. When she bought the bike we were well aware that Givi made Kawasaki’s panniers at that time and so these panniers would fit on the Givi rails. The original pannier rails are really ugly and spoil the look of the bike when no luggage is fitted to it. The new rails are fitted with quick release bolts that allow the main parts of the rails to be removed from the bike when no luggage is  required. As part of this new rail system you can also fit a top box rack as well., due to the wayGivi Luggage fiited it is fitted this has to be fitted to the bike at all times. If you don’t want a top box than you require another kit of parts to be able to fit the rails instead.

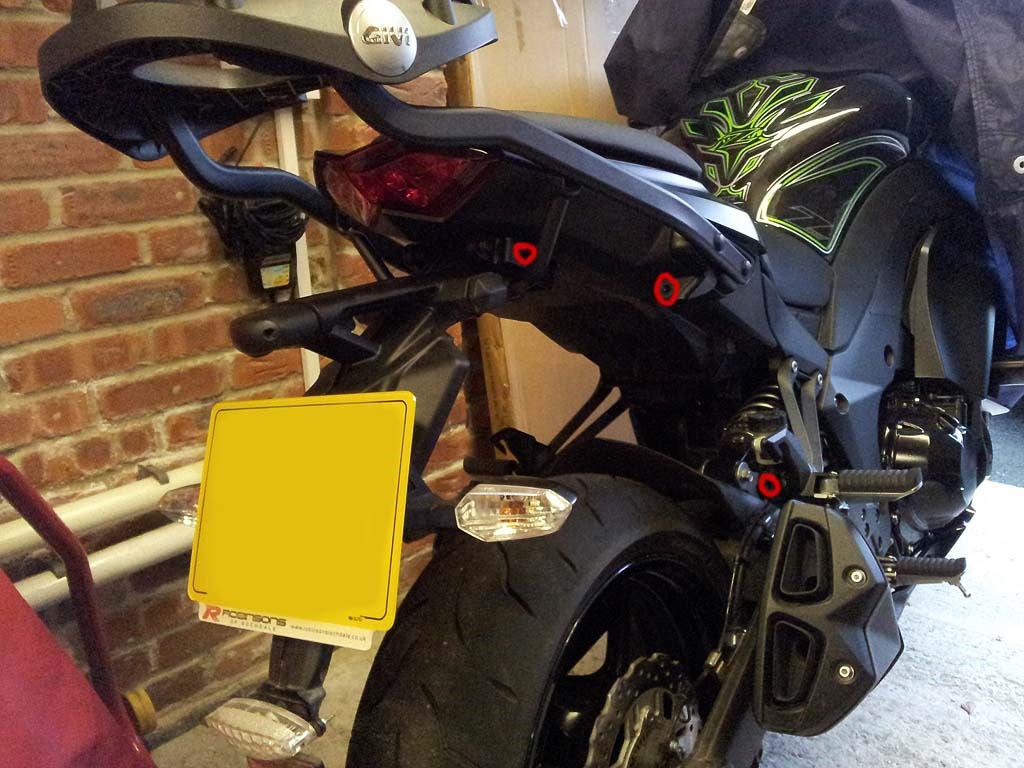
So I set about removing the Kawasaki rails first, one of the first bolts I tried to undo sheared off straight away. Looks like whoever fitted it, put it on far too tightly as the nut was rounded slightly and the allen key hex was also rounded. Fortunately I managed to get the nut and the broken off bolt thread out from the other side. Once that was out of the way I then removed the rest of the rails. The next problem came when I had to remove the bracket (different bracket for new kit) from under the seat. Givi had no instructions on how to actually get at the bolts to install this item. I managed to find some instruction elsewhere and then came across my next hurdle which was in the form of a pair of security screws. It would appear they were protecting access to the ECU, but they also stopped you dropping the under tail tray to get at the bracket. This is where the Dremel came to the rescue as I cut a groove in the top bolt and was then able to remove it was a flat bladed screwdriver. I didn’t need to remove the lower bolt as the under tray was now free. I then replaced the bracket under the tail and also had to install a new number plate and indicator bracket. The indicators have to be installed lower than on tGivi rails removedhe original setup as they would get in the way of the panniers being fitted. Kawasaki had already extended the wires for the  other rails so that had saved me a small job, but I still had to disconnect all the wiring to change over the indicator brackets. Once they were all installed back on the bike and working I could then install the actual rails and rack. This was quite straight forward as Givi’s instructions were very well set out. I had no problems installing the rest of the kit and everything lined up perfectly once put together. The panniers now don’t stick out as far as they did on the Kawasaki rails and the whole luggage set up looks miles better. Also once the luggage is off and the rails removed the bike looks miles better as well. The photo above shows the bike with the rails removed, the red circles denote where the quick release rails locate. Once both rails are installed you then install a quick release bar between both rails that sits just behind the top of the number plate, this bar makes the rails very rigid indeed.

For anyone interested here is a list of the equipment that we installed to achieve this set up.
Givi PLXR4100 rapid release rails for V35 Monokey panniers.
Givi 4100FZ Monokey Top Box rack & M5 Plate
Givi V47NN Tech Top Box
Kawasaki Panniers (made by Givi and are V35 Panniers)

Read more...

Saturday, October 12, 2013

Kawasaki Z1000SX Bling

Motografix Tank ProtectorsHelen has decided to bling up her Z1000SX with some Motografix tank  protectors. She got the Kneepads KK020G kit and the Tank Protector TK016G kit. Obviously I had to fit the kit and being for Helen it had to be lined up with millimetre precision. The kits are high quality items and do justify the price she paid for them. I gave the areas a good clean and then wipe them down with alcohol wipes to remove and grease. After that I removed any trace of dust with a microfibre cloth and then warmed up the tank with a hairdryer. I also use the hairdryer on the gel pads to help them stick down. I had to lift up and reposition some of them a few times but with the aid of the hairdryer I manage to get them to stick down without any air bubbles.

Read more...

Monday, August 26, 2013

Helen’s VFR back to Standard

Helen has recently bought a new Kawasaki ZX1000SX Tourer and will be picking it up in a few weeks time. She has decided that she wanted the VFR put back to standard as the Giles Variobars weren’t cheap (£300+) and she will likely get some money for them on Ebay.

So I have spent today uninstalling the Oxford heated grips and the Autocom unit. I have also removed the Variobars and fitted the original VFR clipons back on. We had to purchase a new throttle sleeve as I had to trim the other one a bit to fit the heated grips to it. It was a bit of a fiddly job but nowhere near as difficult as it was to install them in the first place.

Read more...

Thursday, June 30, 2011

New Screen for ZX-9R

After the aftermarket screen that was on the bike when I bought it, developed even more stress cracks on the screen I decided it was about time I replaced it. I choose to get a dark tinted Airblade Screen, to my dismay when it arrived I realised that my previous screen was also an Airblade one. I was of the opinion that this screen was too rigid and had the potential to crack under stress. Unfortunately my initial thoughts were found to be correct. Within less than 100 miles on the bike the screen had developed several stress cracks on the inside of the screen. They were all in random places so it was obvious the screen was at fault.


Anyway I sent the screen back and eventually after being sent back to the manufacturer I got a complete refund. In the meantime I managed to pick up a 2nd hand screen off Ebay for less than £15 all in. It is a Blue tinted Fabbri Screen and so far it has performed flawlessly. The bubble is a little higher and narrower than the Airblade screen, but I haven’t noticed any difference really. The only minor gripe is when it is very sunny the screen casts a Blue sheen across the clocks which make them even harder to read than they already were.

Read more...

Tuesday, October 05, 2010

New Exhaust for ZX-9R

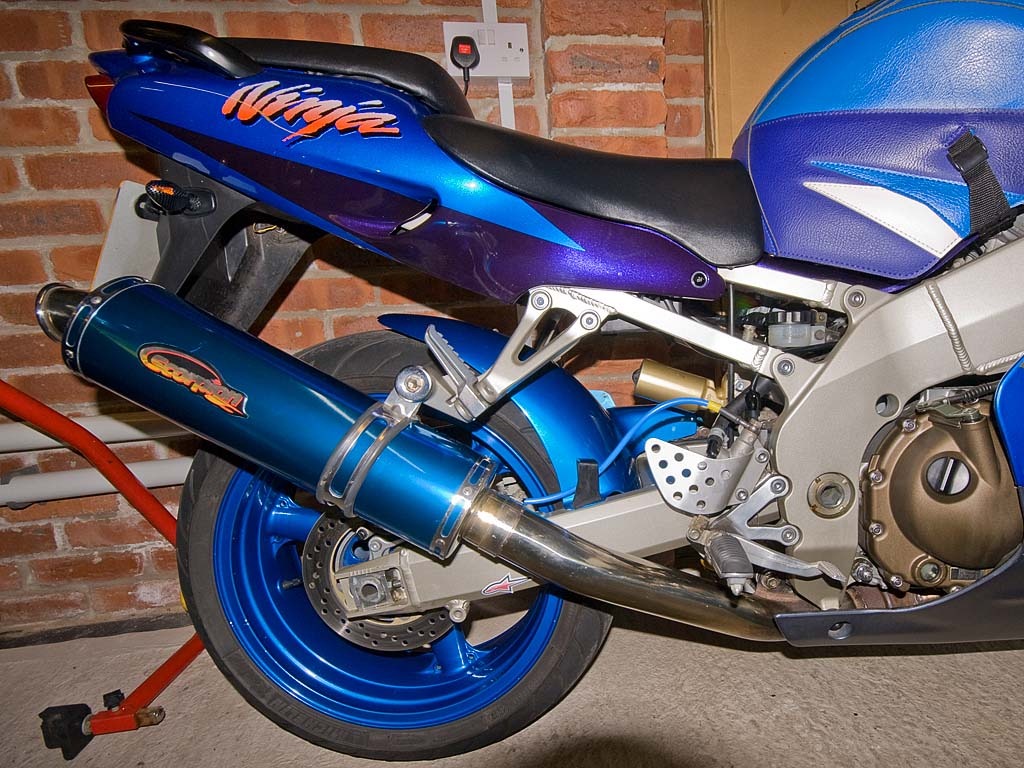
I have recently bought a second hand exhaust off Ebay for the Nine. I got it for a bargain price and except for a minor mark on the inside (which I have managed to cover with the exhaust hanger) it is in excellent condition. The exhaust came with the hanger and a link pipe and was very simple to fit. It is a round Scorpian exhaust in Blue, it doesn’t contain any baffles so is presumably a race pipe and not road legal. Although it doesn’t say so anywhere on it, the previous owners bike also passed the MOT with it on.


Scorpian Exhaust on my ZX-9R


I took the nine out for a 98 mile spin on Saturday over to Holmfirth and onto Saddleworth Moor. The exhaust has a nice deep throaty sound to it and is not over noisy, but could certainly not be described as quiet. The bike seemed to be happy with the exhaust, so I don’t think any further setup of the bike will be required. Although I will be giving the carbs a re-sync at some point.

Read more...

Sunday, May 23, 2010

Maintenance and Modifications

I recently installed a full set of LED indicators on the ZX-9R, to replace the monstrous ghastly affairs that Kawasaki thought looked nice. I had real problems with them flashing too fast. I tried several different resistors at each of the indicators, but they made no difference. In the end I had to fit a new flasher relay that I got from Halfords of all places.


Helen recently had her tyres changed for Michelin Pilot Road 2s on the VFR, for our impending trip to the Pyrenees. When the wheel was off I noticed that the rear pads where very low indeed, which was surprising as it had only done just over 4000 miles. So we went and got a set of HH sintered pads and fitted them, I also gave the callipers a good clean as 1 of the pistons was sticking a bit.


In preparation for our trip I also changed the oil and filter on my VFR. I also changed the clutch and brake fluid as it had never been changed by Honda. The clutch was a nice simple job, but the brakes are another story. There are a total of 7 bleeds valves that need to be opened to fully bleed the system, each one of these has to be completed in sequence and it isn’t possible to do it on your own. I also changed the rear pads as they where quite worn and stripped and cleaned all the callipers, none of my pistons were sticking much.

Read more...

Saturday, April 10, 2010

Modifications to Helen’s VFR

Helen decided even before she bought the VFR that she wanted a set of Variobars fitting to the VFR, so she didn’t have to lean heavily on her wrists. She bought the set of Gilles Variobars and bar riser kit in silver at the same time as she bought the bike from Hunts.

I unpacked the bars and was very impressed by the quality of the bars and components. The instructions I wasn’t so impressed with, they were in bad translated English and the extra instructions and kit of parts for a VFR were useless. The picture and instructions I believe refer to the previous VFR model as in 1 of the pictures a pipe is missing in the picture which gets in the way of their intended clutch routing path. So I completely disregarded the instructions and went about installing the bars as I thought best.

Gilles VariobarsI started with the left bar first and it became quickly evident that the clutch would need re-routing or it wouldn’t reach the fluid reservoir. So I drained and disconnected the pipe and re-routed it over the top of all of the brake pipes and cabling on the left side, then reconnected it and filled and bled it back up. I also re-routed all the cables to the left bar switches, they were originally on the inside of the fork, but had to be routed on the outside of the fork. Although the bars have many adjustment positions, due to the location of the screen pillars and tank I was limited to only a few of them. Next I started on the right hand bar, fortunately the brake pipe to the reservoir just about fitted and so I didn’t need to adjust it at all. I did find that the throttle cable and wiring to the switches wasn’t going to work in there original positions. I had to loosen the throttle cables at the engine to enable me to disconnect them at the throttle grip. Once they were disconnected I found that they were best routed on the inside of the fork, rather than the outside. I also had to re-route the cabling to the switches on the outside of the fork instead of the inside. Once everything was connected back up and I turned the bars from lock to lock, everything just about reached and the bars don’t hit the screen or tank.

Gilles Variobars With the bars installed I then put the new Oxford heated grips on, they went on pretty easy and the installation is very simple. It is suggested they are connected direct to the battery, but other people have noticed that they do drain some power even when they aren’t switched on. So I decided to connect them to the battery via a relay that was switched in by the rear tail light circuit. At the same time I also connected in the old Autocom unit that was installed on her previous BMW F800ST.

Helen is very happy with the position of the bars on the bike and feels the riding position is now very similar to her previous bike. Lets just hope that when MOT time comes round next year that the bars pass with flying colours, as I am not too sure what the criteria for bar movement is.

While I was in the garage I also fitted some invisible film to both sides of the tank, as Helen like me has a habit of gripping the tank with her knees and potentially wearing the paint away on both sides of the tank.

Read more...

Wednesday, February 11, 2009

Rear Hugger

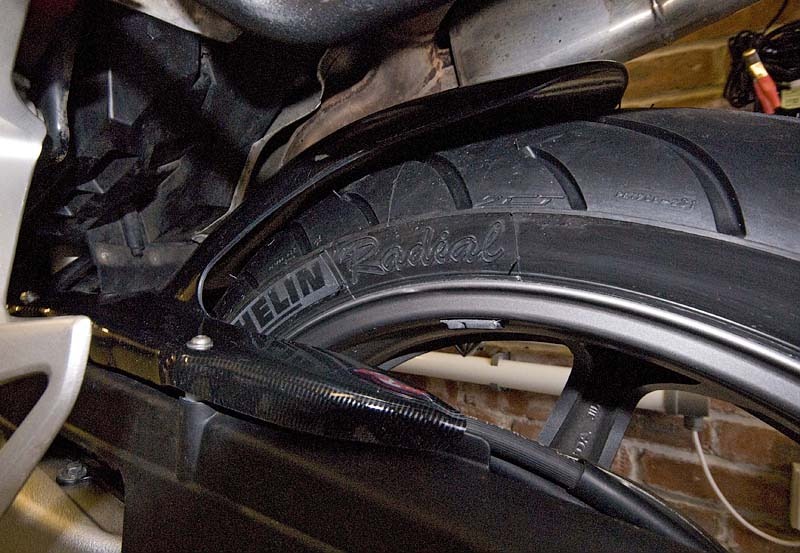
Hugger After a lot of thought, I have finally purchased a rear hugger for the Viffer. I was initially going to buy a NWS hugger but after hearing that they had been taken over by Pyramid I decided against it. In the end I opted for a Red-Fox hugger which I got from the Simpson Detour (manufacturers) website.


I opted for this one in the end after reading several threads on the VFR Club Forum. Although some people had suffered some cracking it seemed that they had been able to get them replaced without to much fuss.


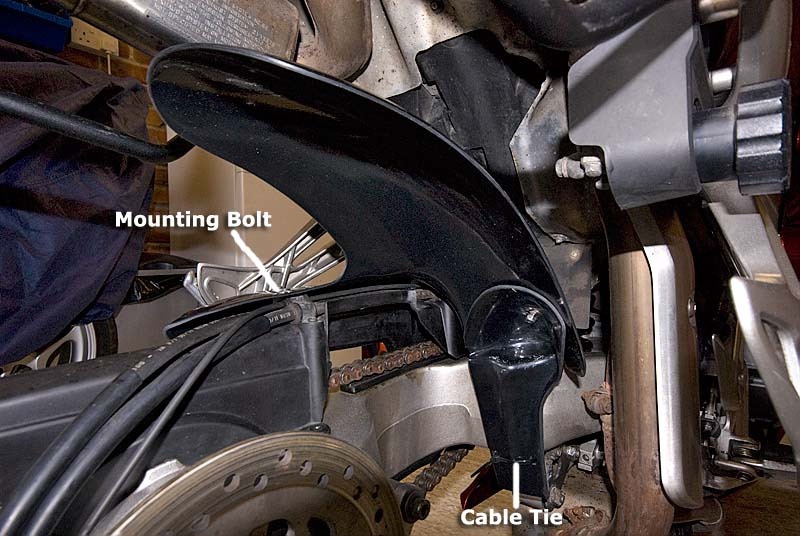
Hugger Anyway I went and picked up the hugger from the post office today and then proceeded to fit it. The hugger attached by using 2 replacement bolts on the chain guard and a cable tie round the bottom of the swing arm by the shock. I fitted it pretty easily considering the instruction were a little vague. The hugger seems to be a decent strong construction and fitted very well and without much fuss. I went for a carbon look one in the end to blend in better.

Update: This hugger turned out to be no good in the end as it cracked due to vibration. It has since been replaced with a NWS hugger from Pyramid, which is a quality product.

Read more...

Sunday, February 08, 2009

New Tax Disc Holder

Tax Disc Holder Due to severe corrosion on my original fork mounted tax holder. I decided it was about time I purchased a new tax holder. I got this nice carbon effect one from Hein Gericke and while I had the panels off the bike, I installed it on the left side just above the gear lever. I used one of the water expansion tank bolts to fix it with. Seemed to have plenty of length on the bolt to be able to hold the tank and holder in place. But I did have this location in mind so purchased a holder with a thin bracket on it.

Read more...

Wednesday, January 21, 2009

Helen's New Screen & Mudguard

Helen's Screen Just after Christmas Helen ordered a new Givi screen for her bike from Hein Gericke. We went and picked it from the store in Salford today. I then fitted it later on that day. It was very easy to fit, just a matter of removing 3 screws to take the old screen off and then using those screws to fix the new screen back on with. Helen says that the new screen is better but make the wind sound more louder.


Helen's Mudguard I have also recently modified Helen’s rear mudguard. We initially removed it because it was very large and ugly. But we found that loads of crap was getting on the bike without it on. So I decided that we could remove the bottom bit of the mudguard and just use the top half. So I went at the mudguard with a hacksaw and cut off all the mudguard that was below the number plate. The mudguard is now functionally but not spoiling the looks of the bike anymore.

Read more...

Saturday, October 18, 2008

Double Bubble Screen

Went to Hein Gericke this morning for the Zero Gravity Double Bubble screen. Taking it out of the packet it looks like a good quality product. Light smoke is a little darker than I thought but clear enough to see through if hugging the tank.

Zero Gravity Double Bubble Screen
Fitted it straight away, which was a breeze. I would say that it doesn't fit as well as the old screen but unless you look closely you don't notice the tiny gaps here and there.

Read more...

Saturday, September 13, 2008

Fettling with Helen's Bike

I have been messing with Helen's new bike today. I had the dangerous task of drilling holes into the fairing to fit a set of R&G crash bobbins to the BMW. Can you imagine how much trouble I would have been in if I had put the hole in the wrong place. Thankfully my usual time consuming carefulness made sure that the holes were in the right places.
R&G Bobbins 
After fitting the crash bobbins I then installed Invisible Film to both sides of the tank to protect it from Helen's knees scratching the tank when cornering.

Read more...